
WooCommerce Extensions
REQUIREMENTS
- WordPress version 4.6 or later
- WooCommerce version 2.6 or later
- WooCommerce stock management must be enabled:
WooCommerce > Settings > Products > Inventory > Manage Stock
SETTINGS
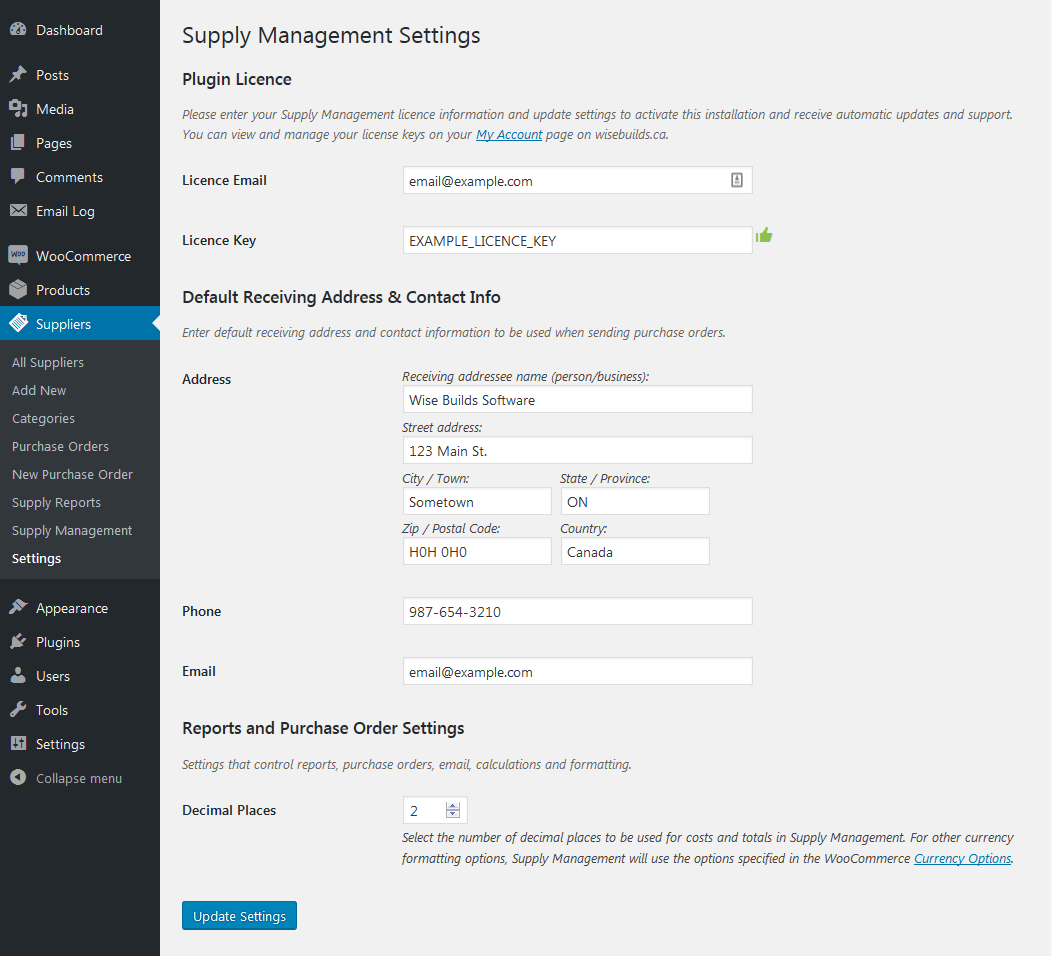
Supply Management settings can be found in the WordPress admin menu under: Suppliers > Settings
Plugin Licence
To enable support and automatic updates, enter your licence email address and licence key which you will have received in your order confirmation email. Click “Update Settings” at the bottom of the settings page to activate your licence. You can view and manage your licence keys and site activations in your wisebuilds.ca account under licence keys.
Default Receiving Address & Contact Info
Enter your default receiving address and contact information to be used when creating purchase orders. These values can be overridden in individual purchase orders should you need to specify a different receiving address or contact information for a particular order.
Reports and Purchase Order (PO) Settings
Supply management supports translation into other languages and uses the WooCommerce currency options (WooCommerce > Settings > General > Currency options) except for decimal precision which can be set here for currencies that require it.
SUPPLIERS
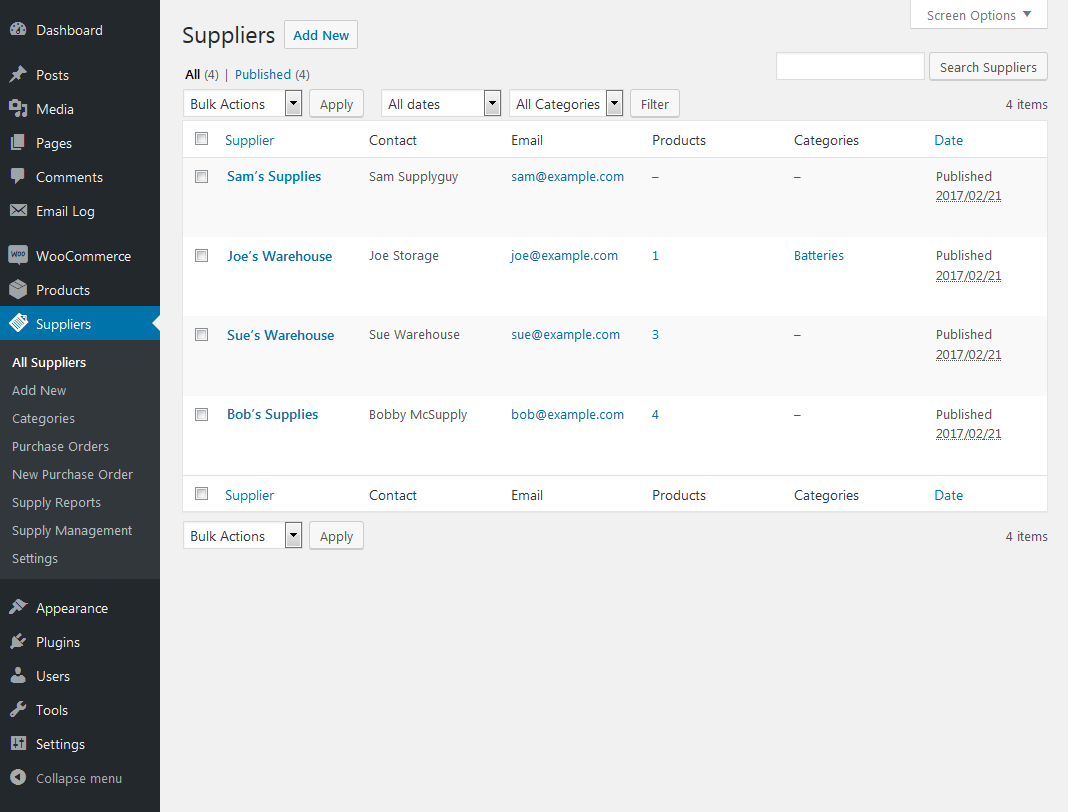
Supply Management creates a custom post type for suppliers, which can be listed, categorised, filtered, created and edited much like normal WordPress posts. The supplier custom post type is not publicly visible and only stores the supplier information as custom post metas.
To list, create, edit or categorise suppliers use the following WordPress admin menus:
- List: Suppliers > All Suppliers
- Create: Suppliers > Add New
- Categorise: Suppliers > Categories
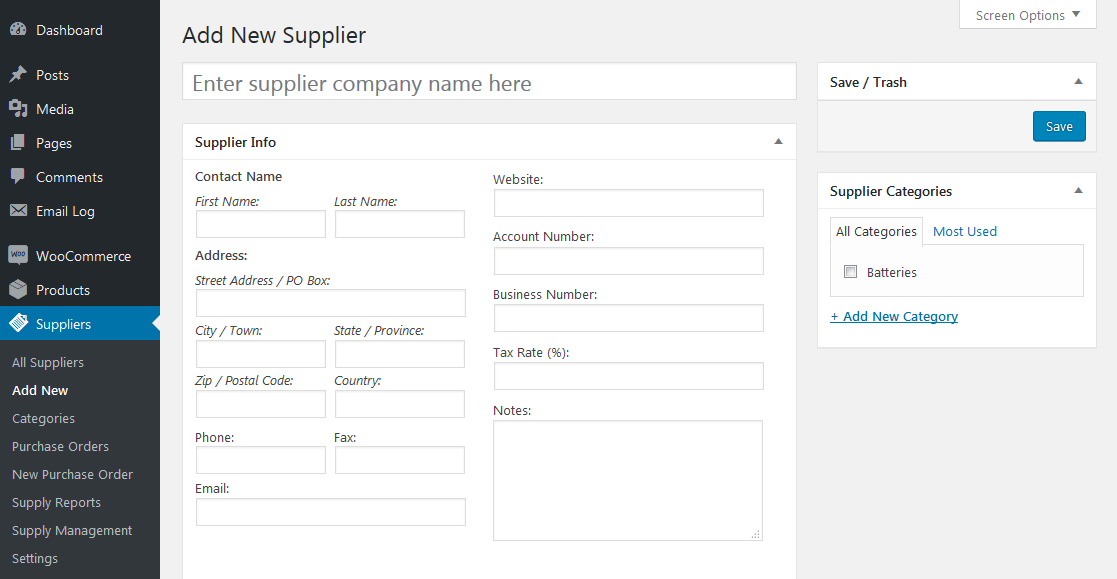
To edit a supplier, click the edit link that appears when hovering over a supplier in the list (as for normal WordPress posts or pages). On the “Add New Supplier” and “Edit Supplier” pages the contact name, address, email, category and various supplier info may be set.
Note that the tax rate specified in the supplier attributes will be used as the default for the supplier when creating supply reports and purchase orders. Once a purchase order has been created for a supplier, the tax rate can be edited for just that order if desired.
PRODUCTS
Once you have created some suppliers, you can now assign them to products, set product costs by supplier and set your desired stock quantities.

Simple Products
For simple products, if stock management is enabled on the inventory tab of the product data, the “Suppliers” tab of the product data will be available to enter supplier information for the product. The suppliers field is a searchable multi-select that allows specifying one or more suppliers for the product. As suppliers are assigned to the product, product cost fields for each supplier will appear. Set your desired stock quantity for the product.
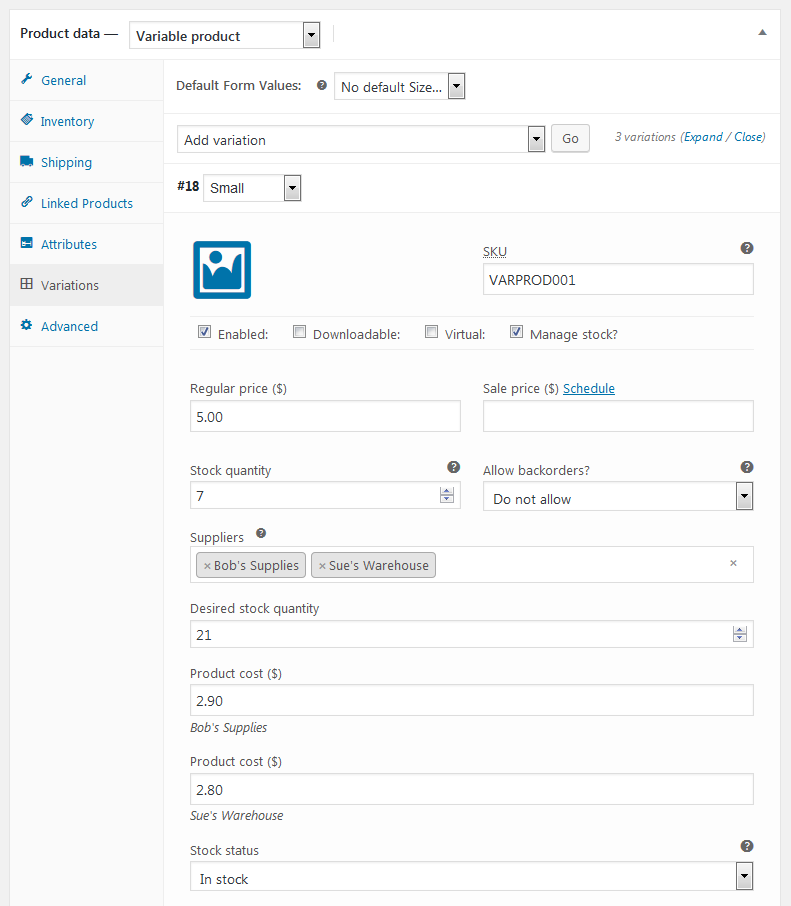
Variable Products
For variable products, if stock management is enabled for a variation the Supply Management settings will appear with the standard WooCommerce stock settings for that variation. If stock management is enabled at the parent product level for the variable product the Supply Management settings for the product will appear on the “Suppliers” tab as for simple products. If stock management is set at the parent product level, it will apply to all variations of that product that do not specify their own stock settings. (Parent stock management settings can be overridden at the variation level.)
Supply Management settings for products and variations can also be edited in bulk as described below: Bulk Edits.
Currently, Supply Management only supports simple and variable products.
REPORTS

With suppliers and desired stock quantities set for products we are now able to generate supply reports. To generate a supply report, navigate to Suppliers > Supply Reports, select a supplier and click “Generate Report”. Supply management will look at all products and variations from the specified supplier and if current stock quantities are less than desired stock quantities, the product or variation will be included in the supply report.
Supply reports may be printed or used to easily generate purchase orders. Prior to generating a purchase order from a supply report, quantities to order and unit costs may be modified and will be used in the generated purchase order. Products/variations can also be removed from the report by clicking the “x” at the end of their row. (Adding individual products can be done on the purchase order page after it is created.)
If there is more than one supplier for a product or variation an exclamation will appear after the item name, hover over it to see which suppliers and what their cost is. This information can be used to decide whether to include the item in the report or purchase order for this supplier.
PURCHASE ORDERS
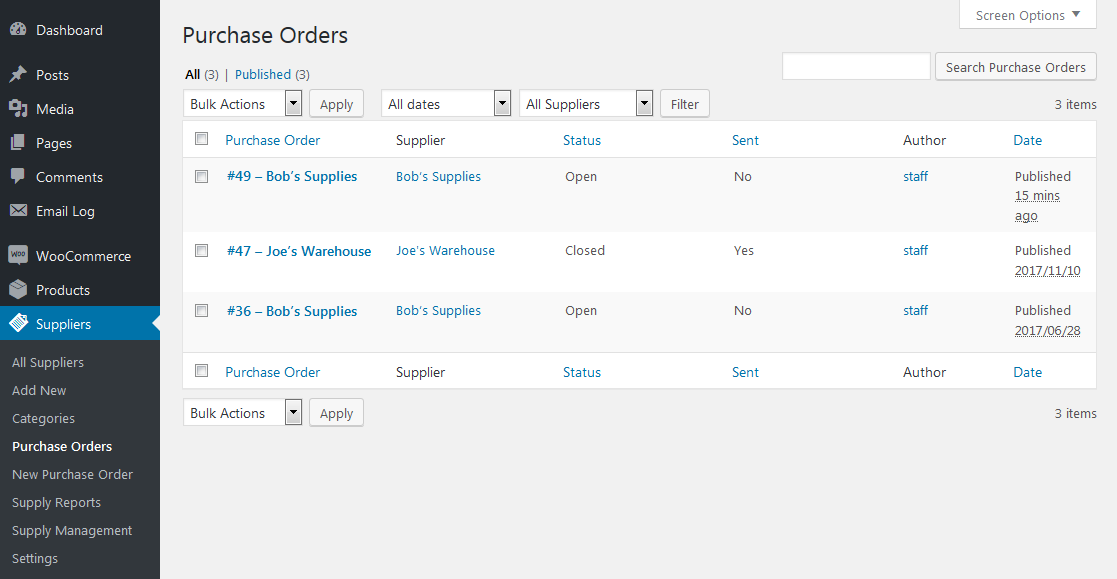
To list current purchase orders, navigate to Suppliers > Purchase Orders in the WordPress admin menu. The Purchase order list can be filtered by supplier, and sorted by status, sent and date. Similar to suppliers, purchase orders are a custom post type that is not publicly viewable. Click a purchase order to edit it or hover over the purchase order name for other actions.
Purchase orders can be created in one of two ways:
- using the “Create Purchase Order” button on a supply report.
– OR – - by creating an empty purchase order from Suppliers > New Purchase Order.
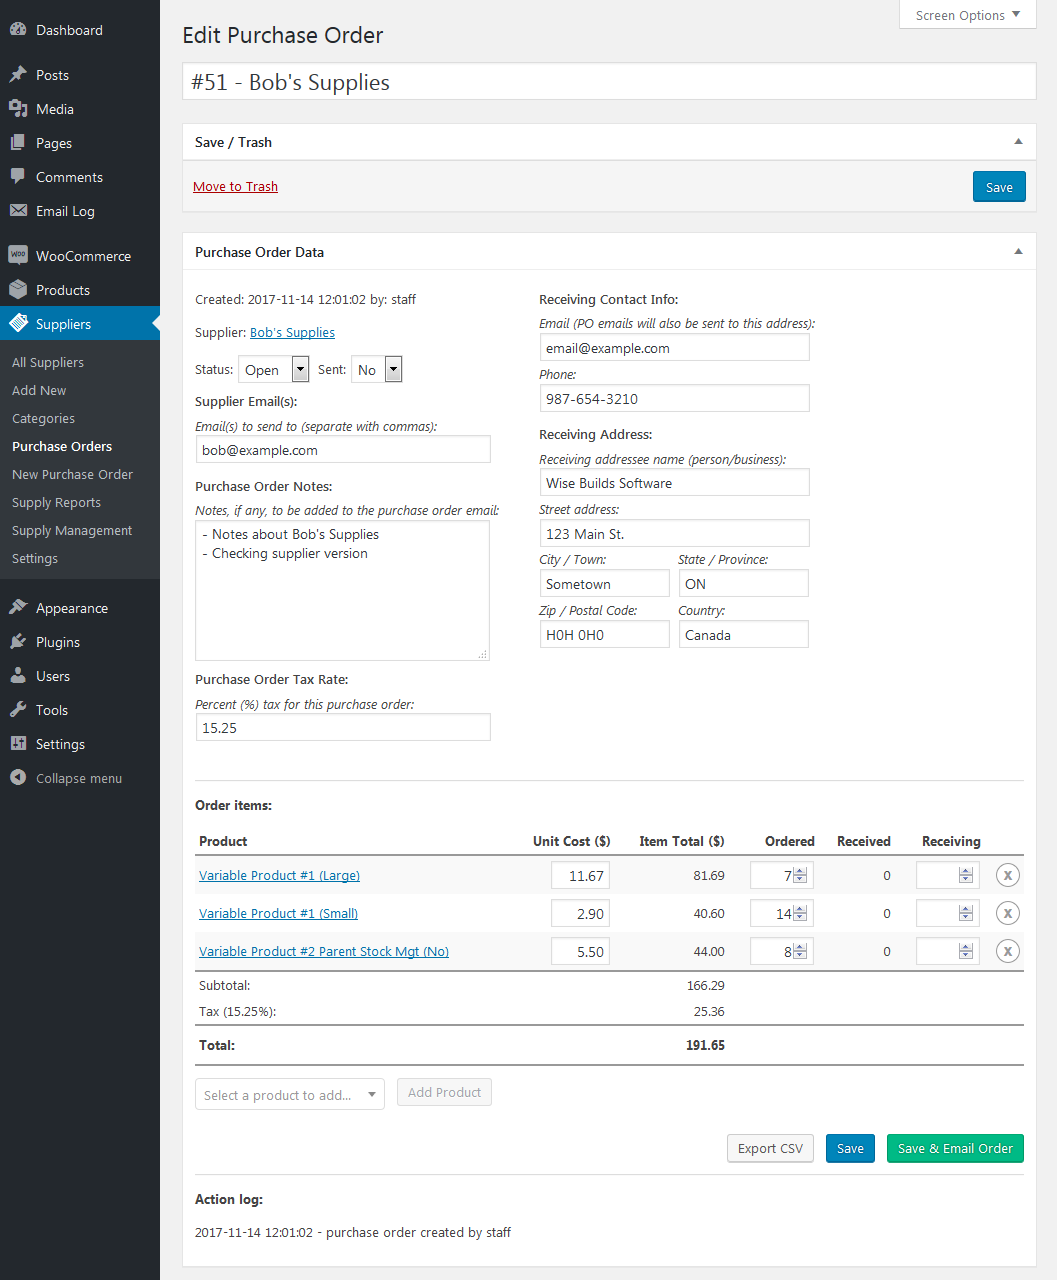
Each purchase order indicates the date of creation and the user who created it. The supplier is indicated separately from the title (should one wish to edit PO titles).
The supplier email, notes and tax rate will be picked up from the supplier profile and can be edited separately on each purchase order if desired. Similarly, The receiving contact info will be taken from the Supply Management settings defaults and can be edited for individual purchase orders.
The purchase order status will be set to closed automatically when all items in the purchase order have been entered as received. Similarly, the sent state will be set to ‘yes’ when the purchase order has been emailed. The purchase order status and sent state can be toggled manually if needed.
For each item in the purchase order, the unit cost, quantity ordered and ‘receiving’ columns can be modified. Items can be removed by clicking the “x” at the end of each item row. While the PO sent state is ‘no’, additional items from the supplier can be added to the purchase order using the select and “Add Product” button below the order items table.
As implied above, when a purchase order shipment is received, the items from the order can be entered as the quantity you are “receiving” on the purchase order (click “Save” at the bottom of the purchase order to apply changes), and your WooCommerce stock will be automatically updated and the quantity received will be recorded in the purchase order. When all items have been received the PO status will be set to ‘closed’.
All purchase order actions and the user who performed them are recorded in the purchase order “Action Log”. If desired, a comma separated values (CSV) file of the purchase order items can be produced by clicking “Export CSV”.
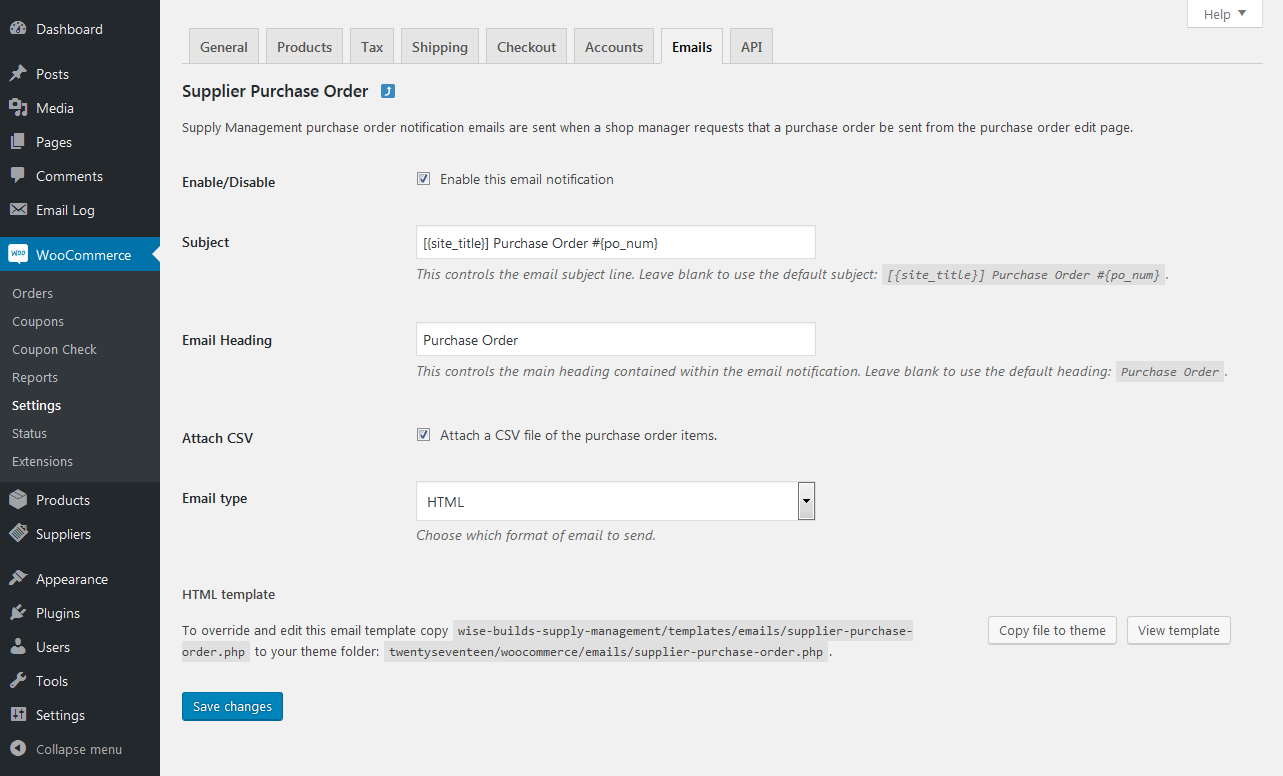
Supply Management provides settings for purchase order emails using the WooCommerce email templates system under: WooCommerce > Settings > Emails > Supplier Purchase Order. There, the email notification can be enabled/disabled, the subject and heading modified, the email format set and whether to attach a CSV of the order items or not. If you wish to customise the email template it can be copied to your theme folder.
BULK EDITS
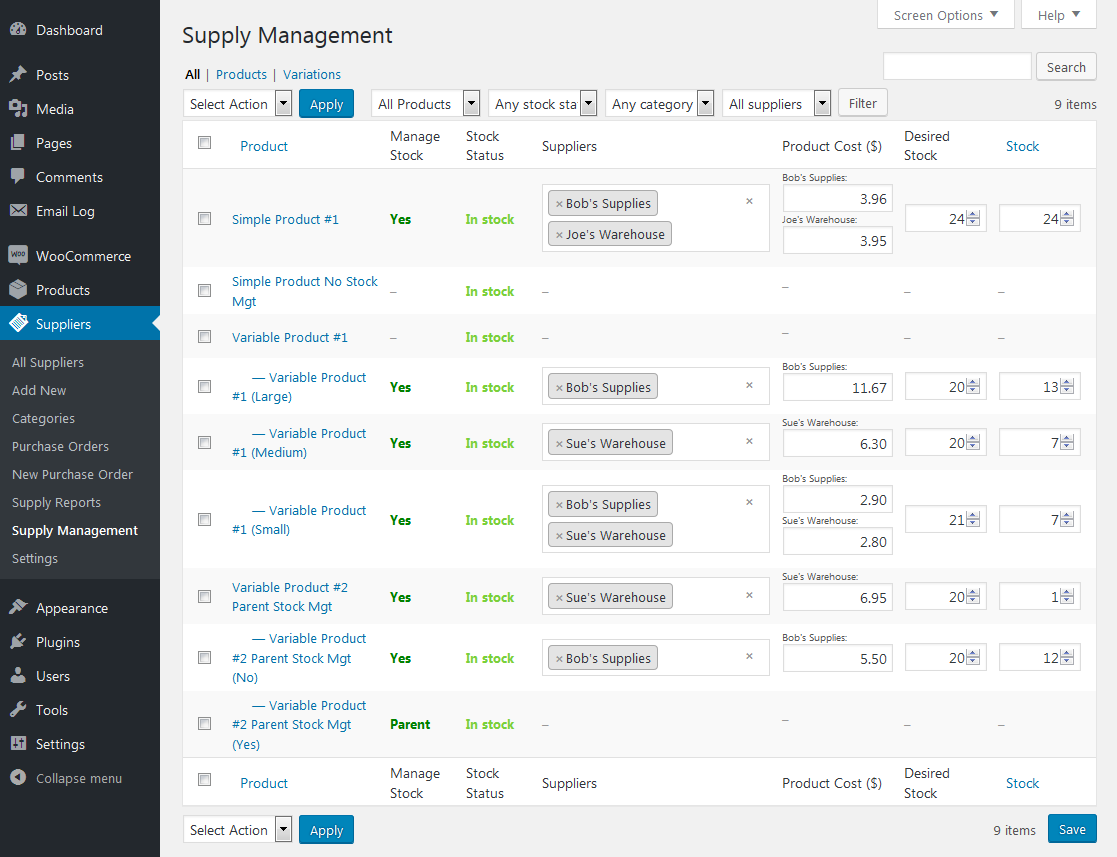
To avoid the need to edit products one by one which can become very impractical for large inventories, Supply Management provides a bulk editor under Suppliers > Supply Management.
All products can be listed or just simple/parent products or just variations. Products can be filtered by stock management setting, stock status, product category or supplier. Products can also be searched and the results edited as any other list state. Also note the WordPress “Screen Options” tab at the top of the page where you can select which columns to display in the list.
The Supply Management settings and current stock for each product can be set just as when editing individual products: suppliers, product costs and desired stock. After editing values in your list, click the “Save” button at the bottom of the list to apply your changes. Additionally, other stock related bulk actions can be performed by selecting the checkbox(es) for a desired set of products and selecting an action, then clicking the “Apply” button.
Missing information? Unsure of how to do something? Please submit a support ticket for assistance.